【笔记】HCIE Storage v3.0 OceanStor Pacific分布式存储架构
OceanStor Pacific分布式存储的架构和实验。
软件架构
分布式存储,可以理解为多节点服务器,通过网络将节点连接在一起,然后通过软件部署,形成统一的存储池。
节点角色
- 管理:负责整个集群的EC算法,重构规则,故障冗余,监控其他节点的状态。数据流量:管理网络
- 计算:实际运行业务的节点,存储控制的机头,通过写入数据时写入到VBS节点,VBS按照EC或者副本的方式进行数据切分。数据流向:存储前端网络
- 存储:提供存储资源的节点,每个硬盘都会有一个OSD进程,数据在VBS进行切分后,写入到OSD节点,OSD和OSD之间重构,数据同步。数据流量:存储后端网络
节点角色与可部署的组件参考:https://support.huawei.com/hedex/hdx.do?docid=EDOC1100376801&id=pro_des_000110,不同的文件系统协议部署的组件稍有不同
关键组件
- FSM(FusionStorage Manager):管理模块,提供告警、监控、日志等操作维护功能
- MDC(MetaData Controller):元数据控制软件,实现控制分布式集群的状态、控制数据分布规则以及数据重建规则等。至少部署3个形成MDC集群,可选择3、5、7、9个节点部署MDC。
- ZK(ZooKeeper):为MDC集群提供选主仲裁,保存集群信息。由ZK集群在多个MDC中选举主MDC,主MDC监控其他MDC,主MDC故障后再选举新的主MDC。有几个MDC就会有几个ZK,MDC在哪里ZK就会在哪里
- OSD(Object Storage Device):管理硬盘的进程,处理VBS下发的I/O消息,执行具体的I/O数据存储空间操作。一块盘一个OSD进程,节点加入存储池时,启动OSD进程。
- VBS:虚拟块存储管理组件(块服务独有),执行元数据管理。通过SCSI或iSCSI接口提供分布式存储接入服务,使计算资源能过通过VBS访问存储系统,从而把卷映射给客户的应用服务器使用。选择节点启用VBS后,该节点上启动VBS进程,部署VBS进程的节点形成VBS集群
- EDS:块的元数据、索引,接收来自VBS的I/O业务,并执行具体的I/O操作。可以执行各服务相关的特性操作(比如快照),同时还可以管理存储空间,建立数据与存储空间之间的索引关系,确保每块数据都可以通过索引找到对应的存储位置。同时数据存储到物理空间之前,进行数据重删压缩处理。加入存储池的节点开启服务时,启动EDS进程、
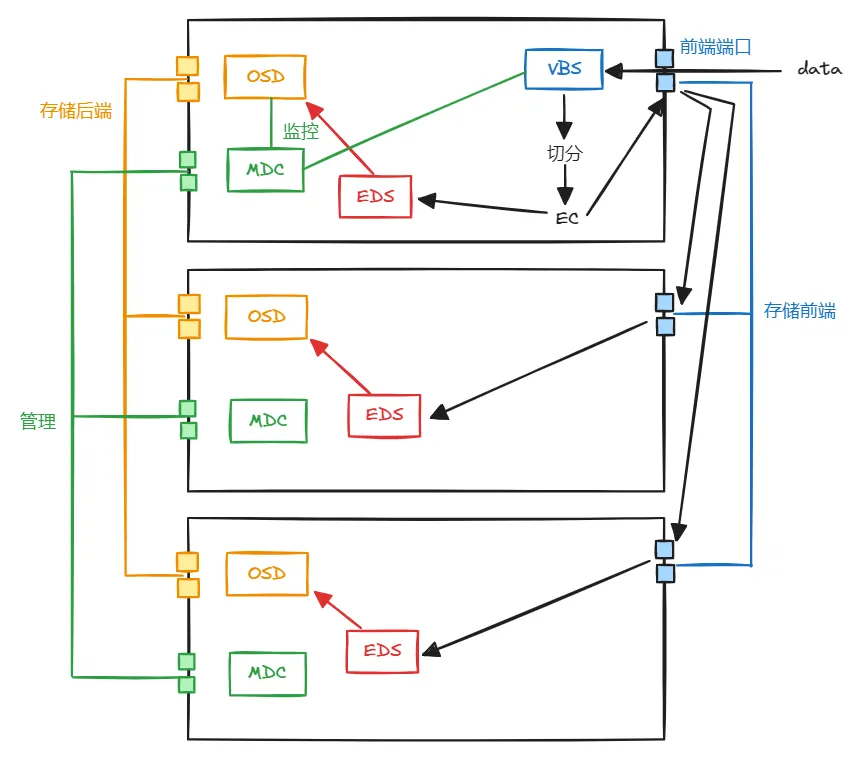
组件交互
- MDC
- MDC一般是主备管理,一个主,多个备
- MDC通过心跳检测机制对OSD和VBS进行状态监控,会与OSD、VBS进行消息交互
- MDC模块启动后,会向ZK注册选主,先注册的为主MDC,ZK通过心跳监控MDC的状态,当主的挂掉后,再重新选主
- 主MDC与其他MDC维持心跳关系,由主MDC确定其他MDC是否为归属MDC,并告知归属MDC管理哪些存储池,主MDC决定归属MDC故障后的接替者
- OSD
- OSD启动时,向主MDC确认归属MDC是哪个,向归属MDC汇报自己的状态,归属MDC再将状态转发给VBS
- OSD与归属MDC维持心跳关系,每秒向归属MDC汇报自己的状态;若归属MDC在5秒内没有收到OSD的心跳,MDC会人为OSD故障,并把OSD踢出存储池,更新OSD view到每个OSD和VBS,在5分钟内没有收到心跳就会数据重建
- VBS
- VBS启动时会查询主MDC,向主MDC注册(主MDC维持了一个VBS表,并同步给归属MDC,以便于其他MDC能将OSD的变化转发给VBS),向主MDC确定是否为主VBS
- 主VBS从主MDC获取I/O view,主VBS向OSD要元数据,其他VBS向主VBS获取元数据
- 一套FS只有一个主VBS,如果主VBS故障,其他VBS会重新向主MDC确认新的主VBS
网络平面
- 管理平面:FSM和FSA的通信
- 存储平面:用于MDC、VBS、OSD的通信
- 业务平面:用于OS与VBS的通信
关键I/O流程(块)
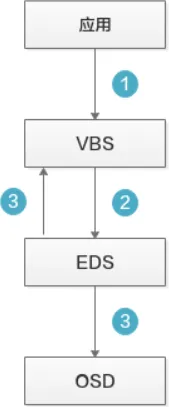
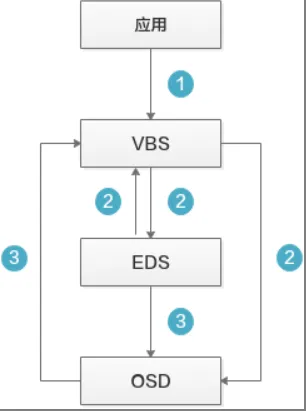
写I/O流程
- 上层应用下发I/O请求到VBS模块
- VBS收到后, 根据算法分发将数据转发到对应节点的EDS模块
- EDS根据I/O大小
- 小I/O(<512KB),EDS直接存在SSD缓存盘中,同时该EDS节点的内存会存储一份数据,EDS会返回写成功给VBS,再由VBS返回给应用。待内存中的数据聚合到更大的块后,系统将数据异步写入OSD中
- 大I/O(≥512KB),EDS将数据直接写入到OSD中做数据持久化
读I/O流程
- 上层应用下发读I/O请求到存储的VBS模块中
- VBS收到I/O请求后:
- 如果系统开了直通读,VBS将I/O请求发送给OSD,OSD处理步骤跳转第三步
- 如果系统没有开启直通读,VBS将根据算法,将I/O转发到指定节点,该节点的EDS模块在内存的写缓存中查找是否有指定数据,然后返回给VBS,读I/O流程结束;否则执行第三步
- 读请求发送给OSD,OSD收到请求后:
- 在SSD的写缓存上查找数据,找到后返回给VBS,读I/O流程结束
- 在SSD的读缓存上查找数据,找到后返回给VBS,读I/O流程结束
- 从硬盘上查找应用所需数据,找到后直接返回给VBS,同时增加该I/O数据的访问因子。如果访问因子达到一定值后会被缓存到SSD的读缓存中,方便下次快速读取
参考:
https://www.cnblogs.com/LongShineW/p/15334207.html
使用存储空间流程(块)
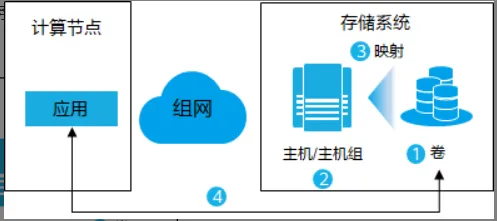
通过iSCSI协议
这个过程比较容易理解。
- 存储系统上创建卷
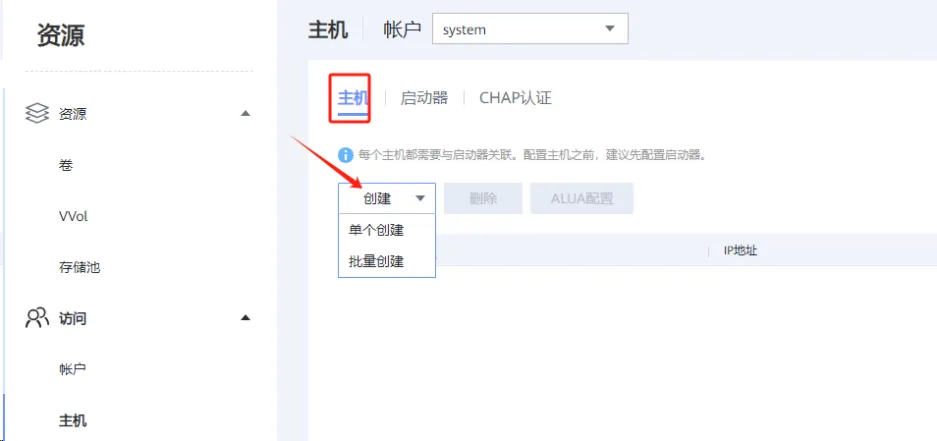
- 在存储上创建主机,将主机和应用服务器联系在一起(如果卷映射多个主机就创建主机组)
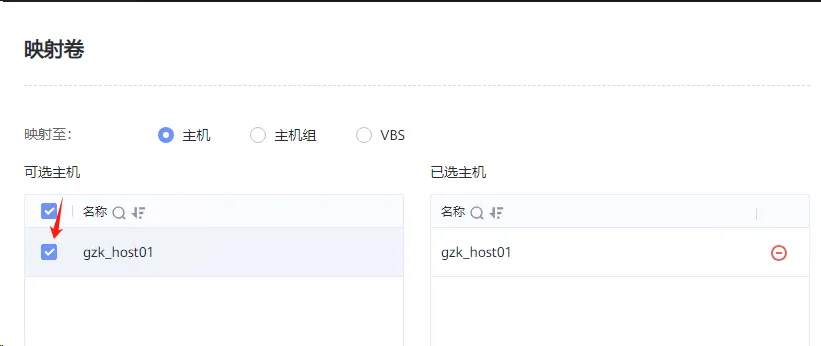
- 将卷映射给主机/主机组,相当于逻辑捆绑在一起
- 从应用侧扫描存储空间
通过SCSI协议

- 存储系统上创建卷
- 为应用服务器启动VBS服务
- 创建卷和VBS的关系。卷、VBS、主机成为逻辑上的整体
- 应用可以直接扫描存储空间并使用
iSCSI实验
主机网络配置
IP地址
业务主机给2个地址,1个是管理地址,1个用于存储地址
本次实验环境:
业务侧:
172.111.0.0/16是管理网段
172.112.0.0/16是存储业务网段
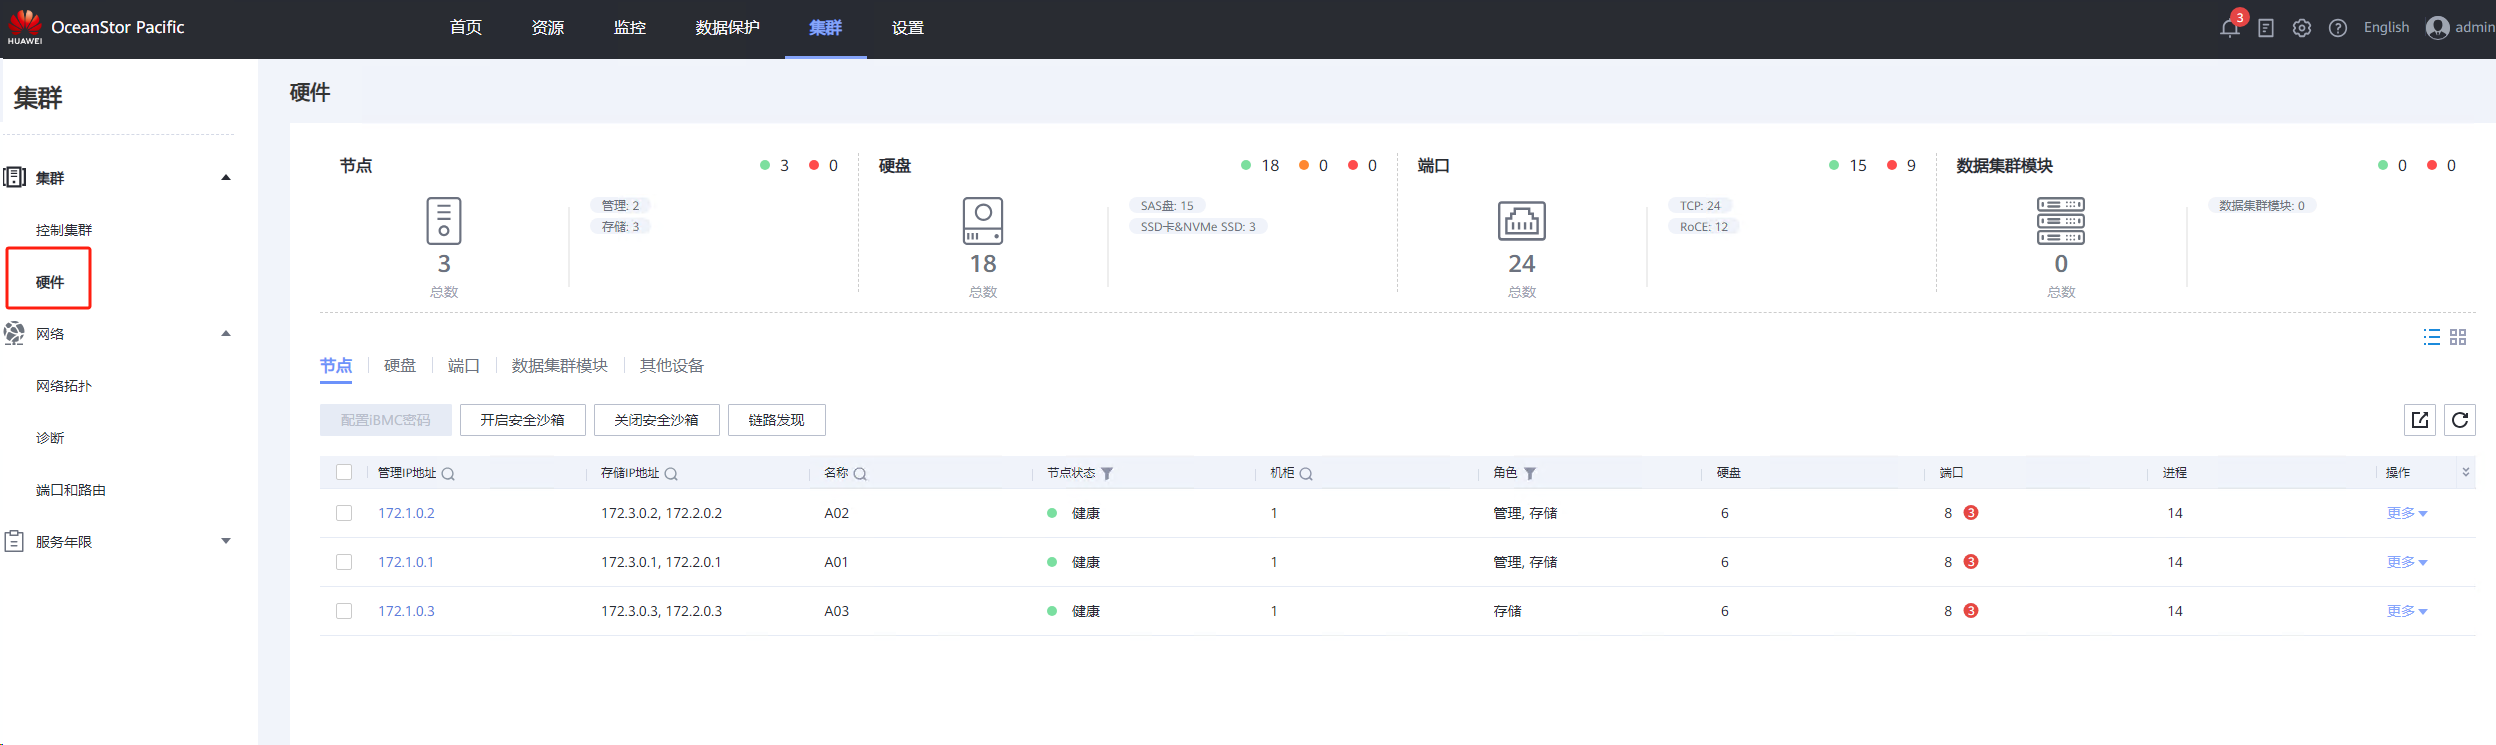
存储侧:
172.3.0.0/16(3台节点,分别为172.3.0.1、172.3.0.2、172.3.0.3)
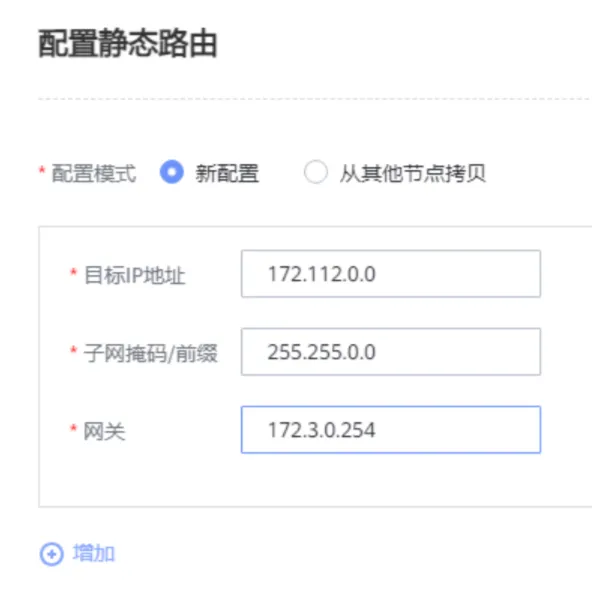
主机添加路由
1 | |
添加存储业务口路由
上面主机侧加了路由,数据包可以到达存储,但是存储侧却不知道去往业务112网段从哪里走,所以,存储侧也需要配置对应的路由让数据包回到业务主机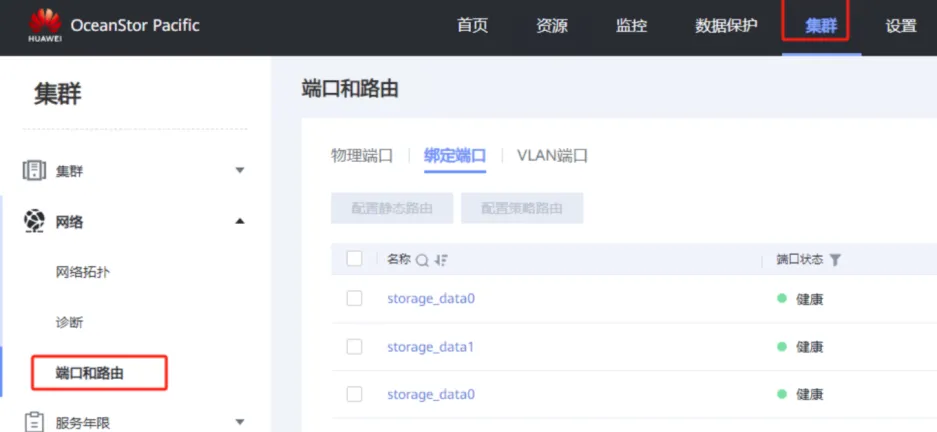
部署的时候将业务口进行了绑定,绑定端口的名字叫storage_data0,地址配置如图所示。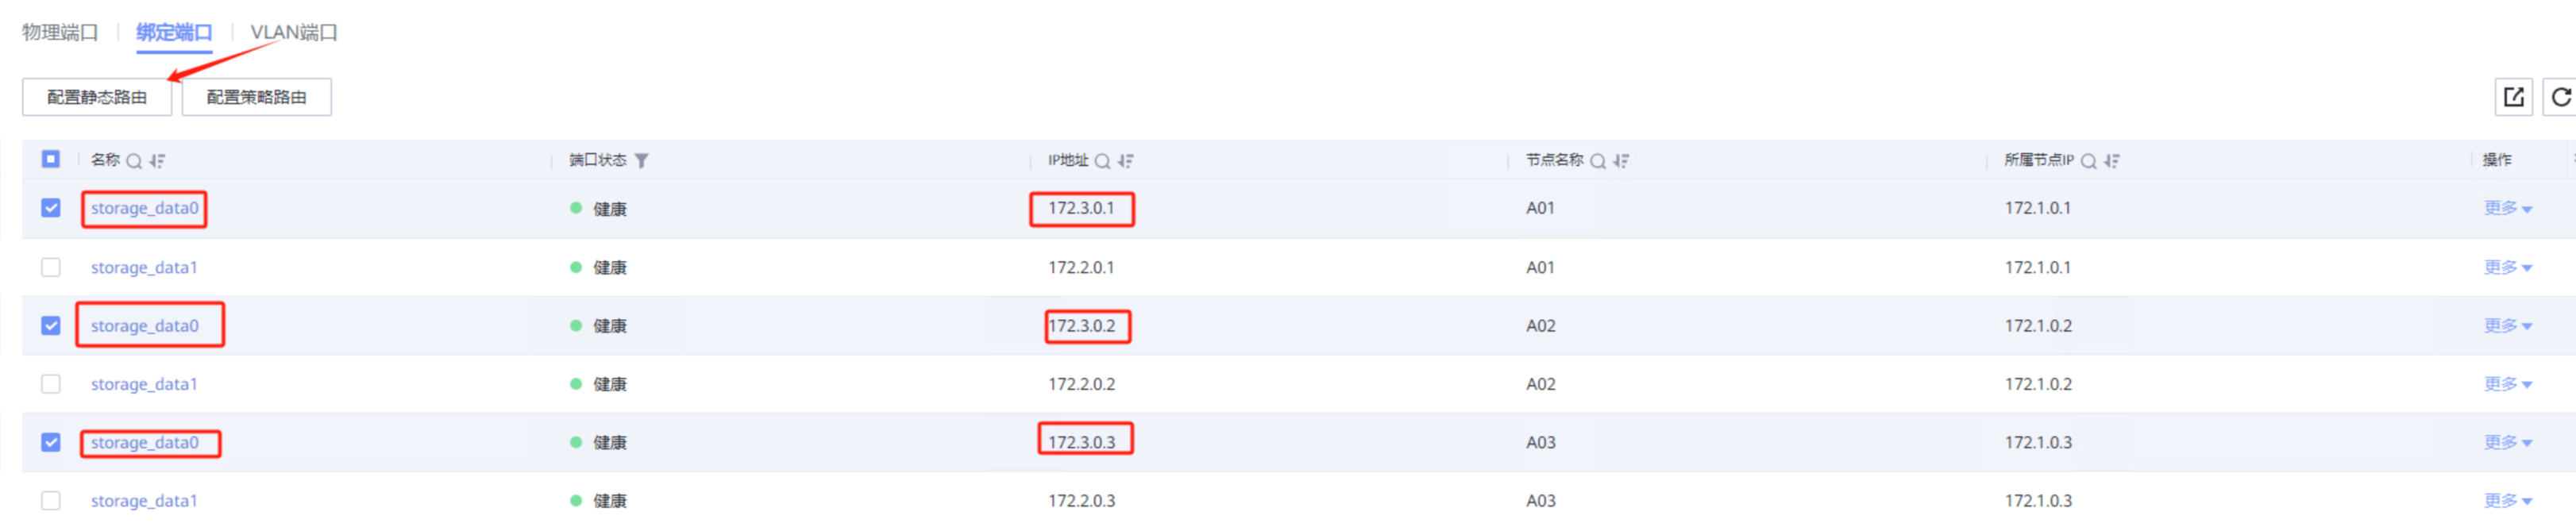
连通性测试
从业务主机上ping存储前端地址: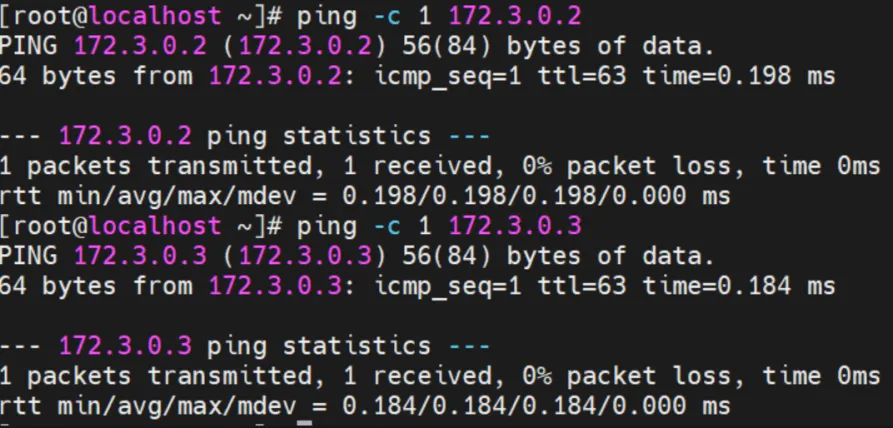
配置iscsi IP

如果没有开启,请点击开启: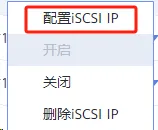
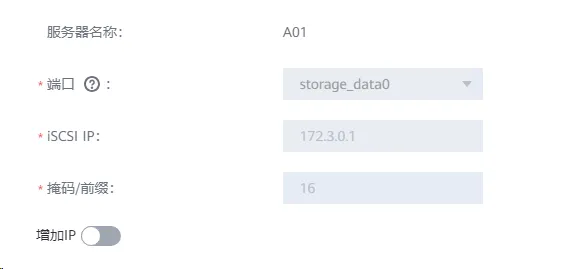
另外2个存储节点同样操作。
发起业务连接
业务主机创建启动器
安装iscsi服务,查看iqn号:
1 | |
存储侧添加该业务主机的启动器:
回到业务主机,发起连接:
1 | |
存储侧创建主机并映射LUN

创建卷: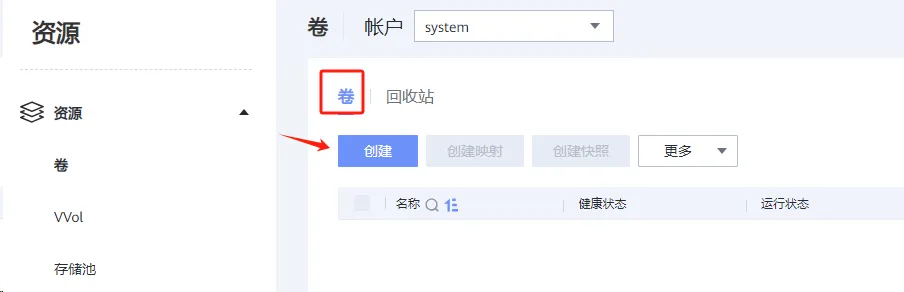
创建映射: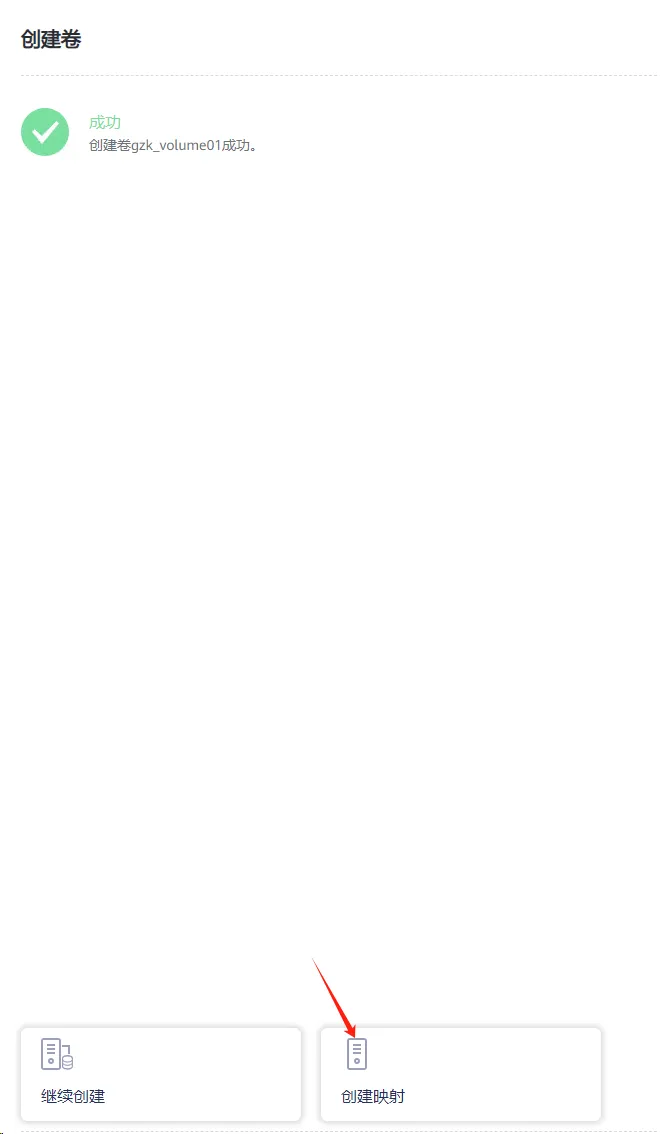
建立业务
扫盘
1 | |
多路径配置
1 | |
格式化分区并挂载
清理环境
停止多路径
1 | |
登出iscsi会话
1 | |
删除iscsi会话
1 | |
存储侧取消映射
- 卷/主机取消映射
- 删除卷
- 移除业务主机启动器
- 删除主机
- 删除启动器
SCSI实验
这就体现出VBS的好处了。
在业务主机侧安装VBS,相当于安装了个代理,VBS直接与OSD访问,速度上比iscsi快。
但是过程上比较麻烦,业务主机安装VBS的话,需要安装一些软件包(要配置好yum仓库,依赖包都在仓库里),从官网找到对应存储版本的tools压缩包(例:OceanStor-Pacific_8.2.0_Tools.tar.gz),在业务主机中解压运行对应OS的脚本即可(下面有详细步骤);目前还不支持在Windows上安装。
查询是否安装过VBS
1 | |
安装操作系统依赖包
兼容性查询
不是所有的系统都支持安装VBS,官网兼容性查询:https://info.support.huawei.com/storage/comp/#/oceanstor-pacific
配置yum源
1 | |
将操作系统依赖包上传至业务主机
如果计算节点的操作系统不是分布式存储OS操作系统,请参考:
https://support.huawei.com/hedex/api/pages/EDOC1100340534/YZM1124Y/03/resources/block_config_000218.html
将将OceanStor-Pacific_8.2.0_Tools.tar.gz软件包上传到计算节点,并解压软件包:
1 | |
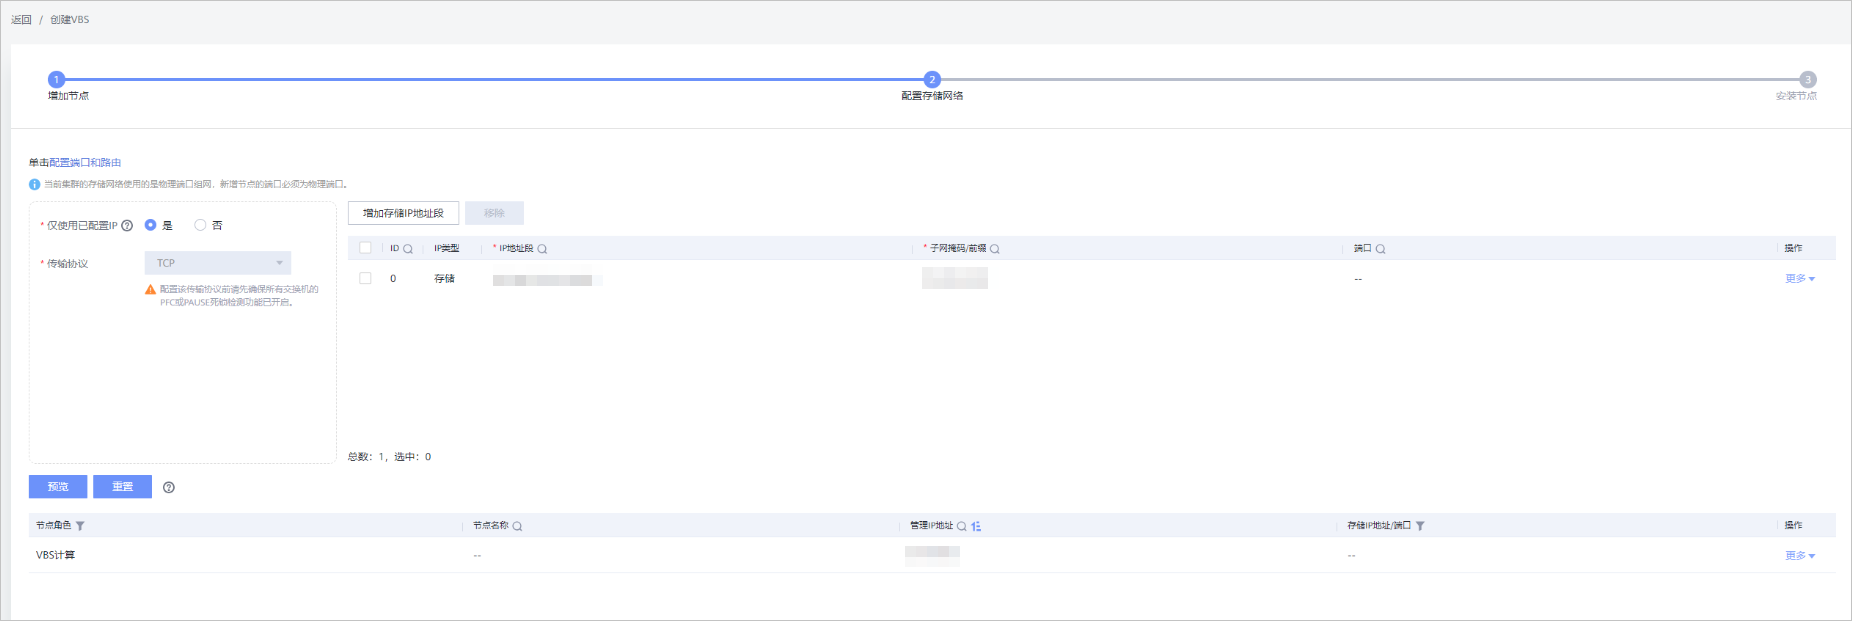
增加VBS节点
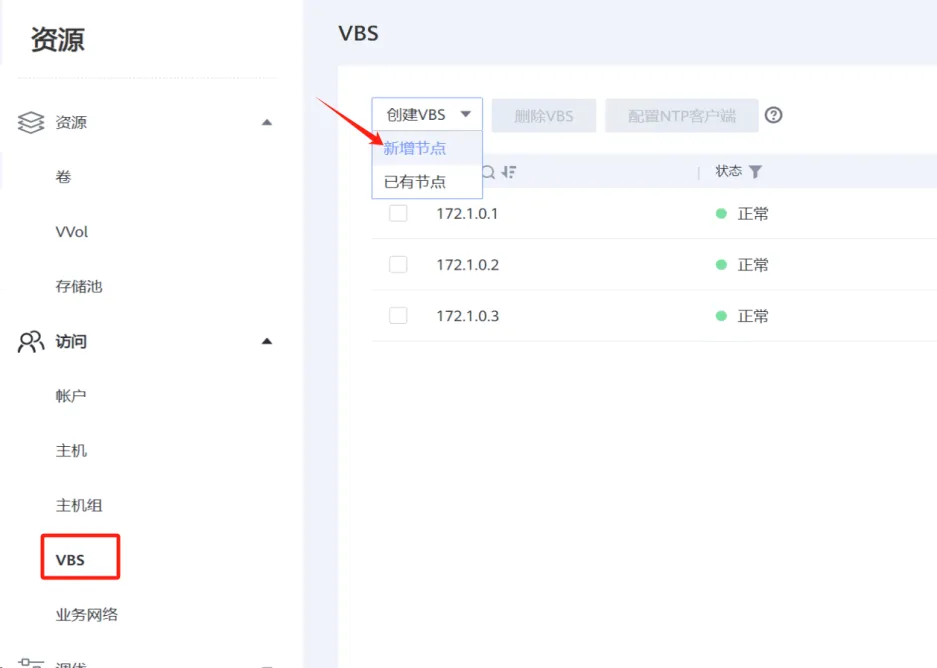
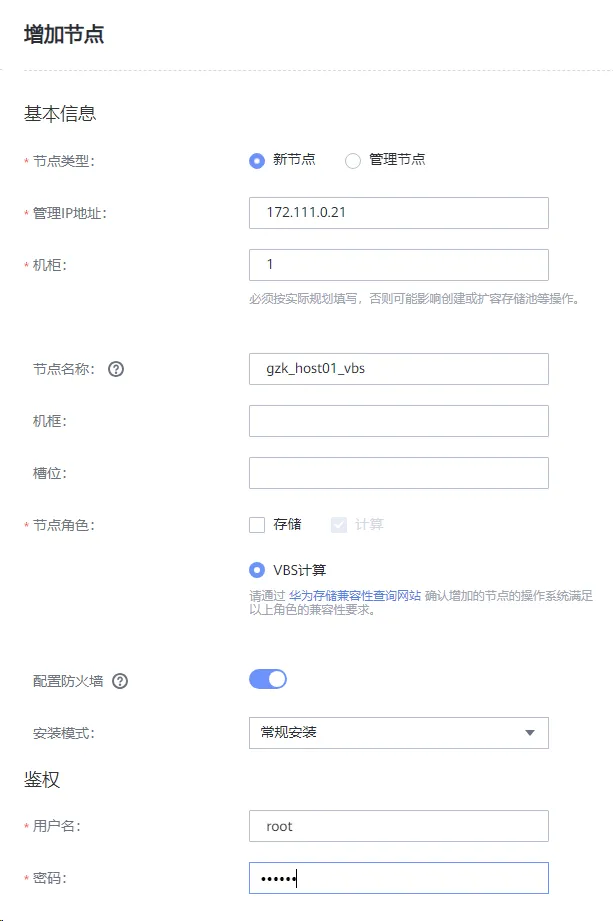
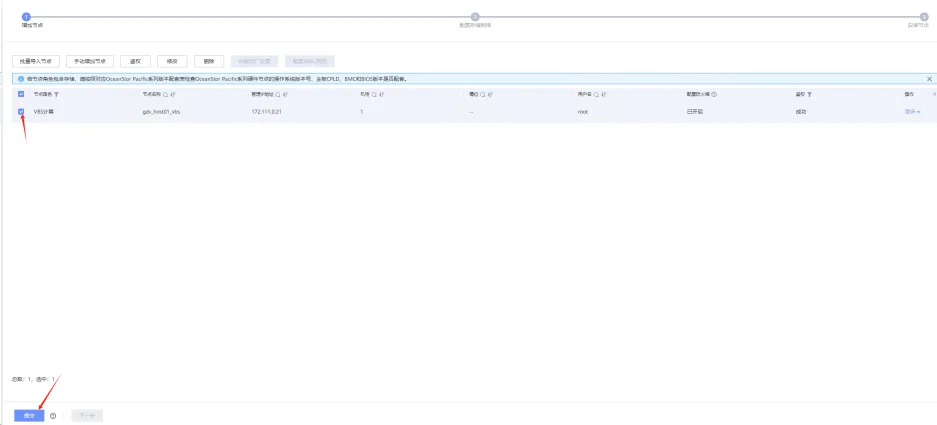


1 | |


创建卷并挂载


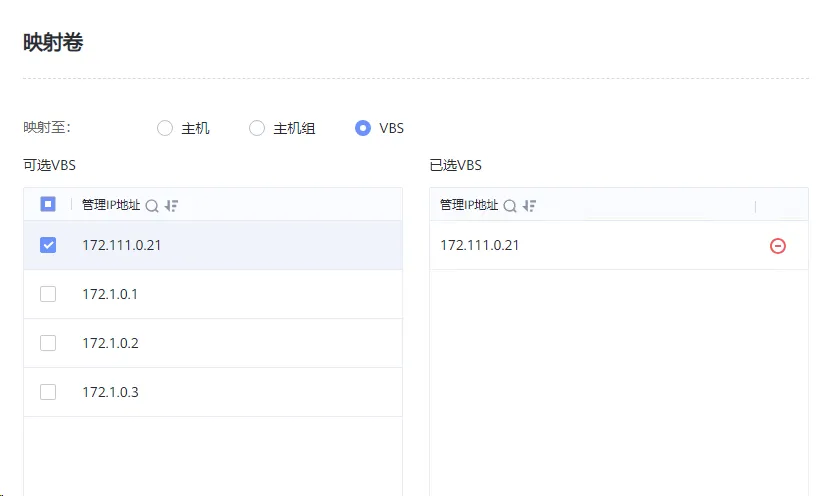
1 | |
清理环境
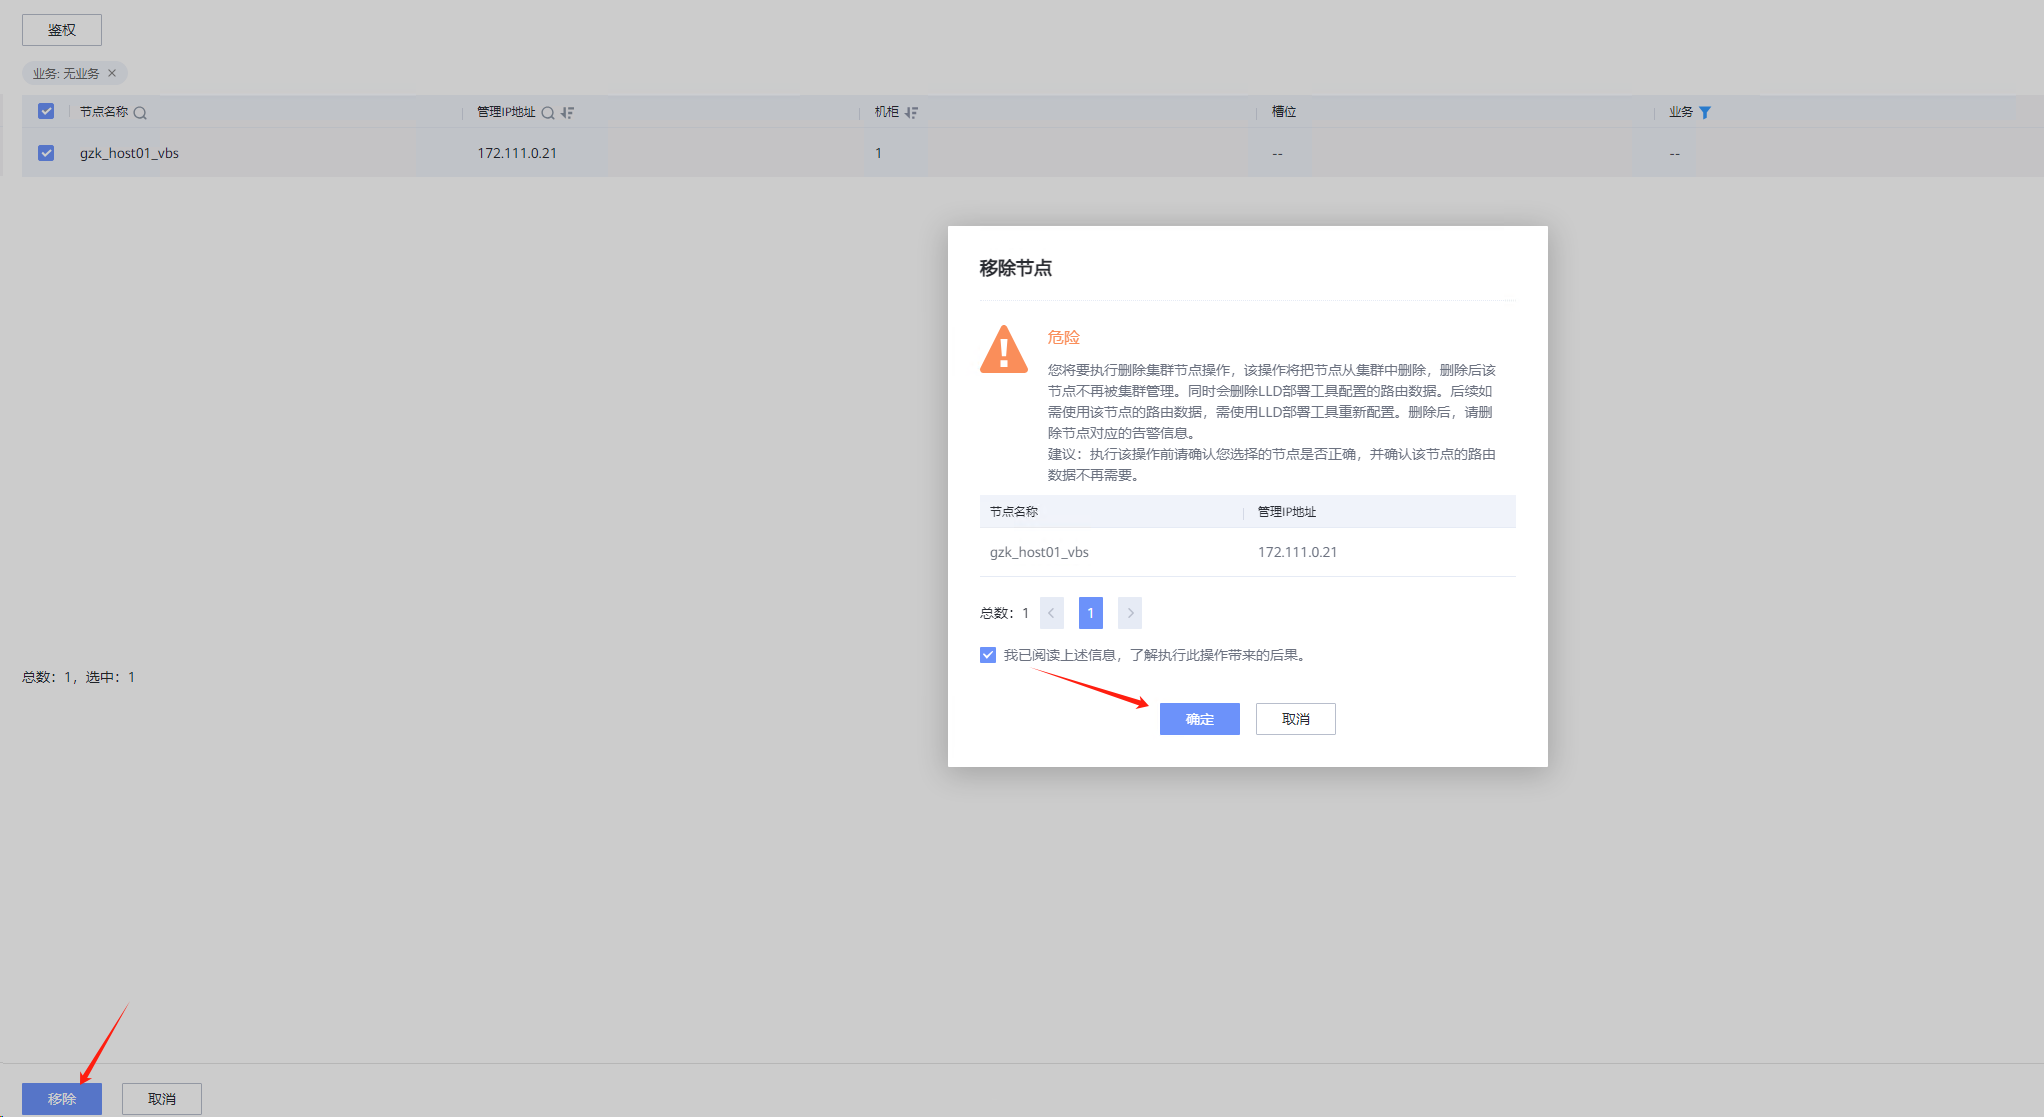
- 解除映射并删除


- 删除VBS

- 移除节点